Handing over management of your Facebook Business Page shouldn’t feel like solved cryptology. Whether you are bringing in an agency to handle social media management, run targeted ad campaigns, or execute website design services that drive traffic, granting access correctly keeps your personal account secure while giving your technical team the permissions they need.
Below is a complete walkthrough on how to grant access to your Facebook Page—both directly via Facebook and through Meta Business Suite.
Method 1: Grant Access Directly via Facebook Business Page (New Pages Experience)
If your Facebook Page is managed directly from a standard profile rather than a central business manager portfolio, use these steps:
Step 1: Switch to Your Facebook Business Page
Ensure you are posting and acting as your Page, not your personal profile. Log in to Facebook on a desktop browser. Click your profile picture in the top right corner, select See all profiles, and choose your Business Page.
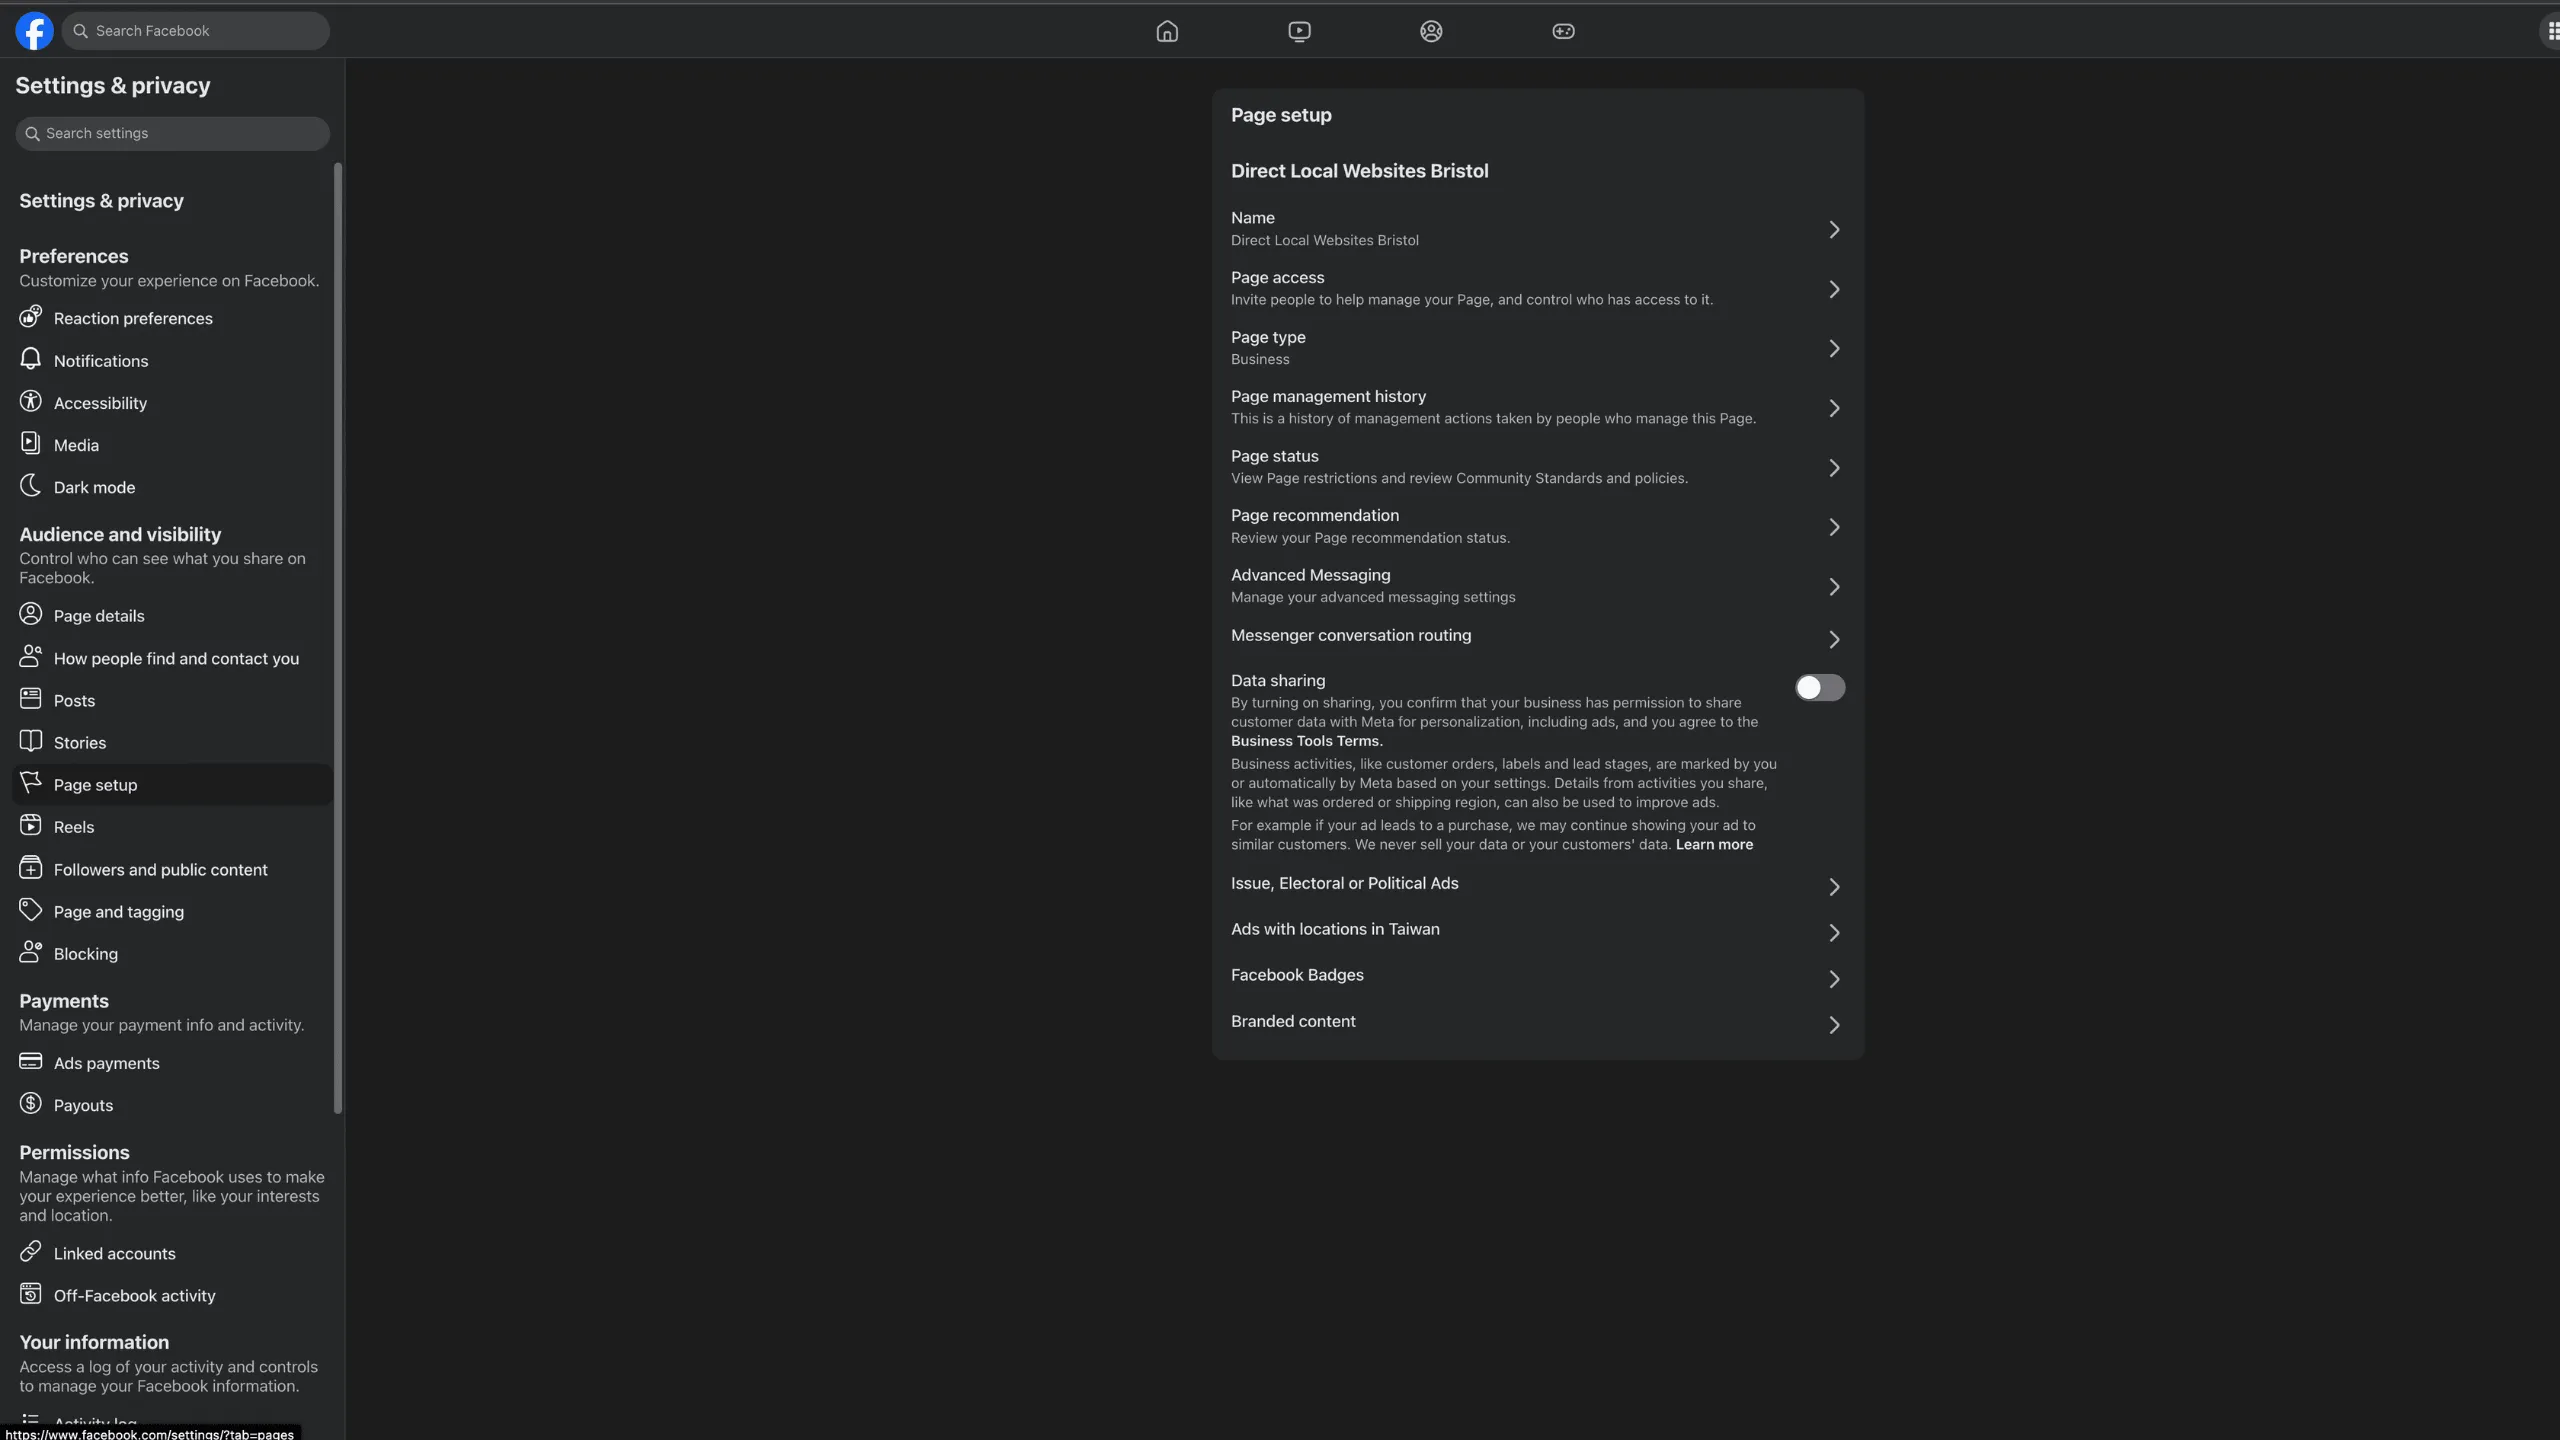
Click your Page icon in the top right, go to Settings & Privacy, click Settings, and select Page Setup (or Professional Dashboard) on the left-hand menu. Click Page Access.
Step 3: Add a New Person
Beside People with Facebook access (for full management) or People with task access (for specific tools), click Add New and click Next.
Step 4: Search and Select User
Make sure you use the exact email address or profile name provided by your team. Type the name or email address associated with the account you wish to add. Select the correct profile from the dropdown list.
Step 5: Set Permissions & Send Invitation
Toggle the level of control required (e.g., Content, Ads, Insights, or Full Control). Click Give Access, enter your personal Facebook password to re-verify, and send the invite.
Pro Tip: You never need to share your personal Facebook password with anyone. Invitations sent via the steps above will trigger an email notification and a Facebook notification to the recipient, which remains valid for 30 days.